How to set Ssl to a s3 Page
• • ☕️ 3 min readTo finish this setup you have to go through these steps: Create an S3 bucket and upload your index.html file Create a cloudfront distribution pointing to this S3 bucket Setup Domain MX records using SES to receive the SSL certificate domain validation email Request a new SSL certificate in region us-east-1 (!) Assign the certificate to your Cloudfront distribution I assume that you already have a (new) domain registered in Route 53 with no A or MX records setup. 1) Create a new S3 bucket for your static files
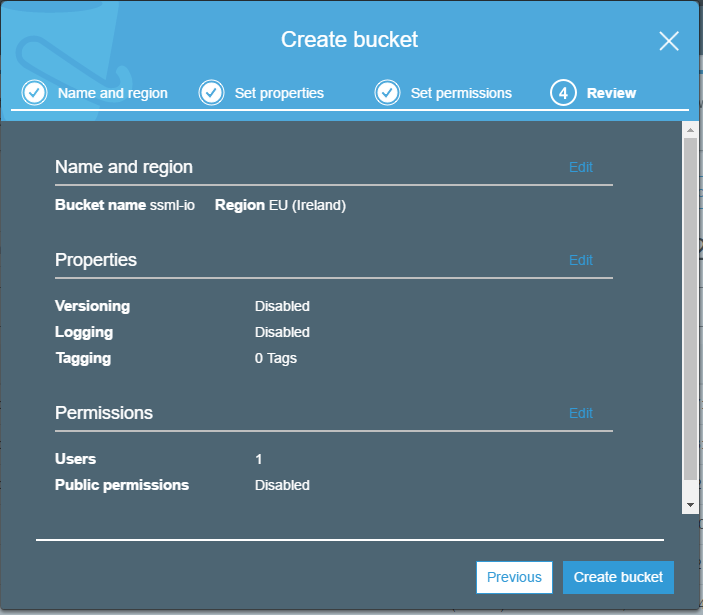 Create a new S3 bucket using the default settings
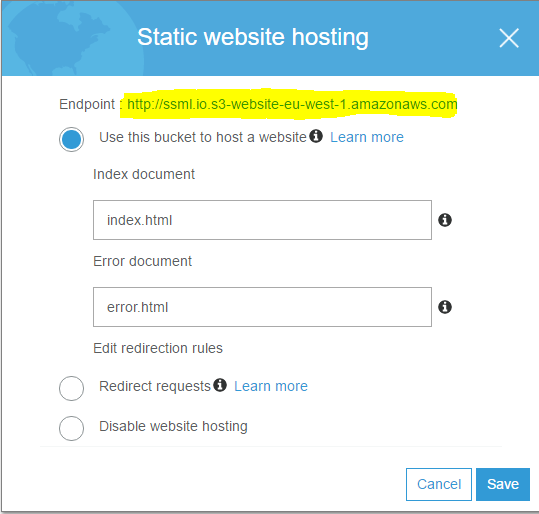
Open the buckets properties and activate “Static website hosting”. Make note of the Endpoint URI.
To save emails on your bucket from SES later, you need to grant permissions to SES to write to your bucket. Add the following bucket policy and replace YOUR_BUCKET_NAME and YOUR_ACCOUNT_ID with your corresponding values.
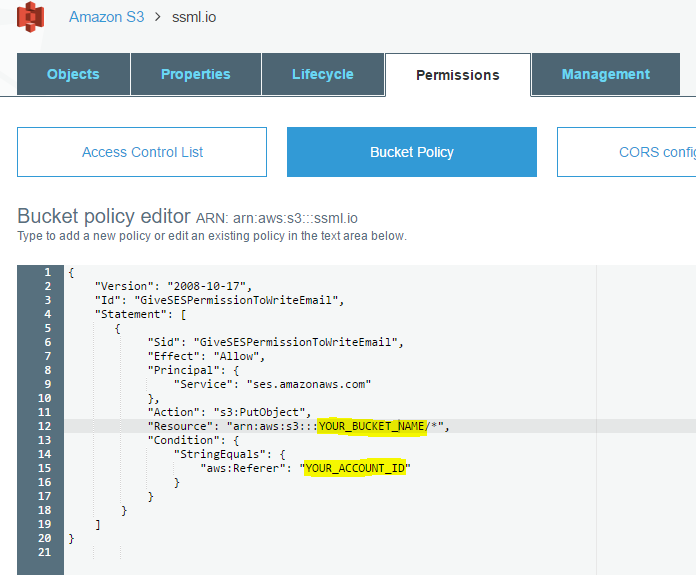
{
  "Version": "2012-10-17",
  "Id": "GiveSESPermissionToWriteEmail",
  "Statement": [
    {
      "Sid": "GiveSESPermissionToWriteEmail",
      "Effect": "Allow",
      "Principal": {
        "Service": "ses.amazonaws.com"
      },
      "Action": "s3:PutObject",
      "Resource": "arn:aws:s3:::ssml.io/*",
      "Condition": {
        "StringEquals": {
          "aws:Referer": "123456789012"
        }
      }
    }
  ]
}
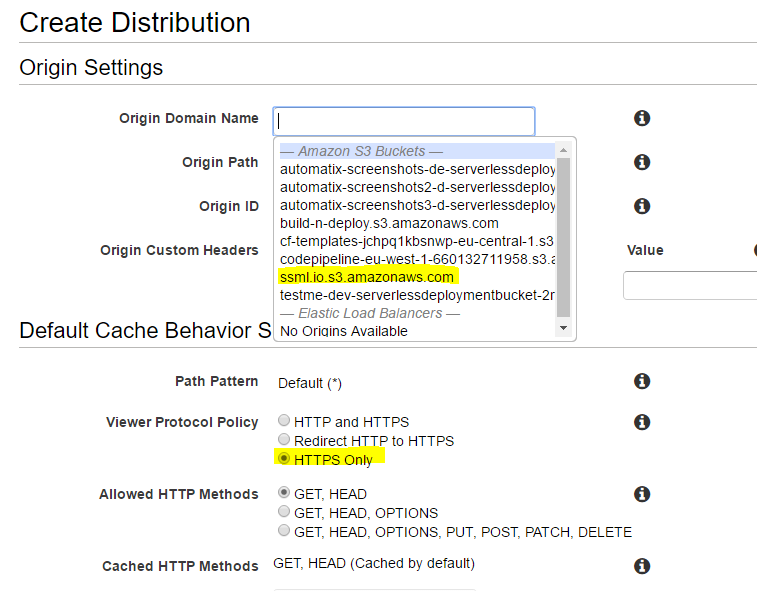
Save the policy, upload your index.html file and your are done. 2) Create a cloudfront distribution using a custom CNAME SSL certificates can only be assigned to cloudfront distributions, so we need to create one to enable SSL for our static website. Create a new Web distribution and select your S3 bucket as Origin Domain Name. Select HTTPS Only for Viewer Protocol Policy.
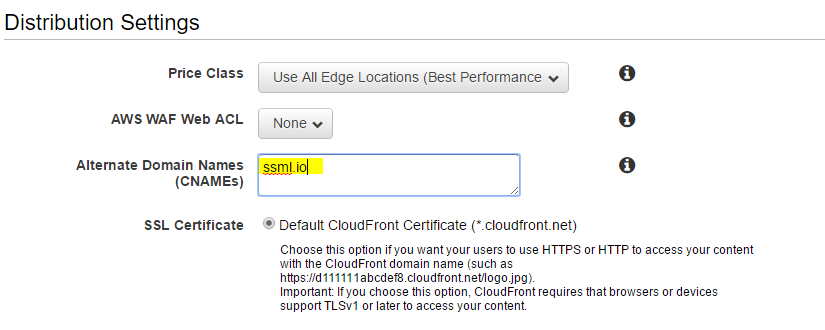
In the Distribution Settings section enter your domain name you want to host your static files on (My site is https://ssml.io). Do not change the SSL Certificate settings for now, as we did not setup our email address to receive the domain validation email for our certificate request.
Beside that keep all the default settings and click “Create distribution”. Grab a cup of coffee or two and wait until the distribution is created……… 3) Setup Route53 MX records using SES to forward emails to S3 Go to AWS SES and verify a new domain. Generate DKIM Settings as well.
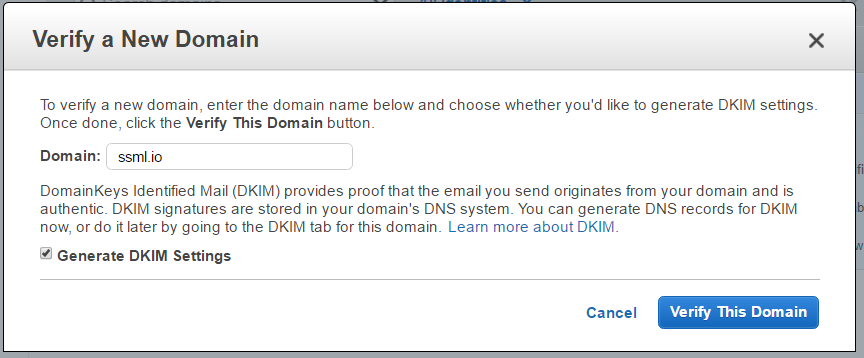 Generate DKIM Settings for your domain to verify your email domain
Click “Use Route53” to setup all necessary Domain Records in Route53. Amazon is handling everything for you :-)
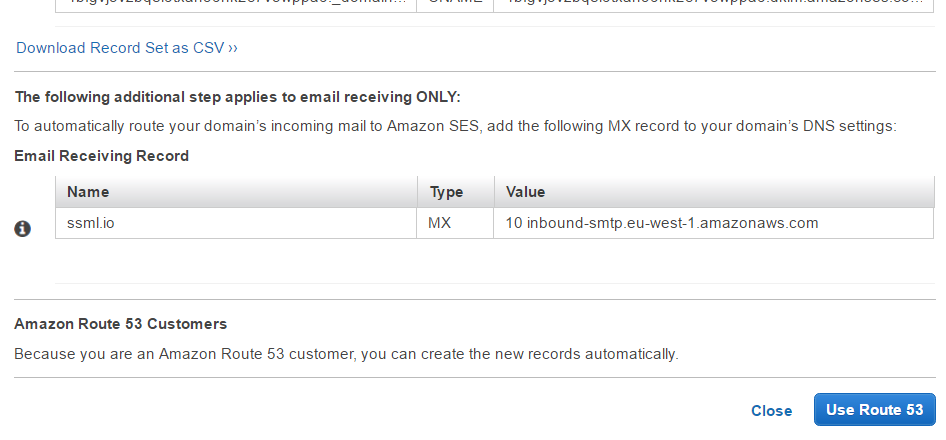 AWS helps yout to setup all your domain records to verify a email sending and receiving domain
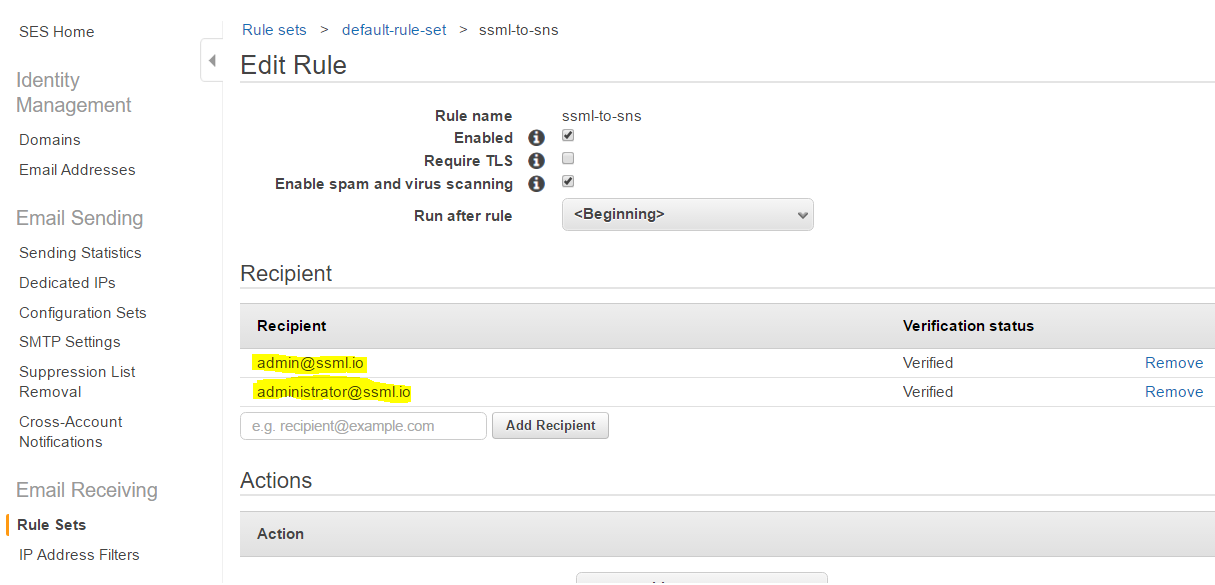
In the left navigation head to “Rule sets”, create a new one and a new “Rule”. Enter administrator@yourdomain.com to the receipients as this email address is used by default to receive SSL certificate domain verification emails.
In the bottom part of the rule settings define a S3 Rule to save incoming email to a ‘folder’ in your bucket.
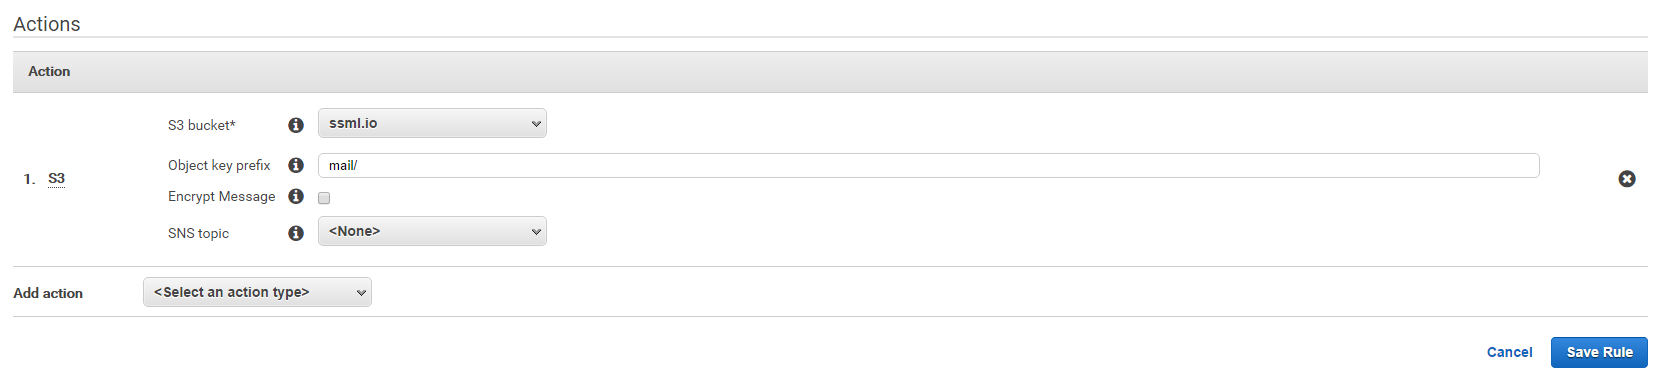 Save incoming email to a S3 bucket
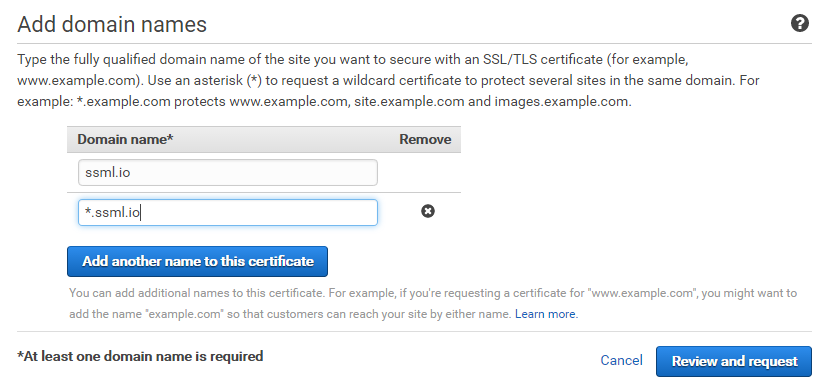
4) Request a free SSL certificate using AWS Certificate Manager (former ACM) Cloudfront only accepts certificates hosted in region us-east-1. Switch to that region NOW. Enter one or more domain names, you want to create a SSL certificate for. You can even use a wildcard.
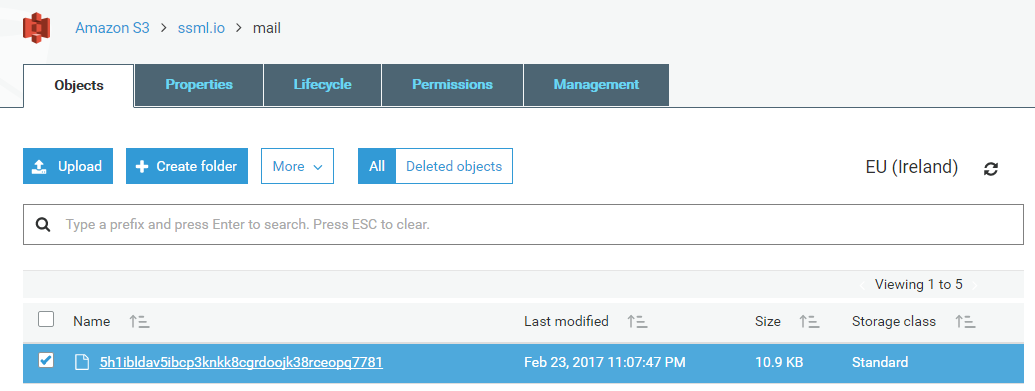
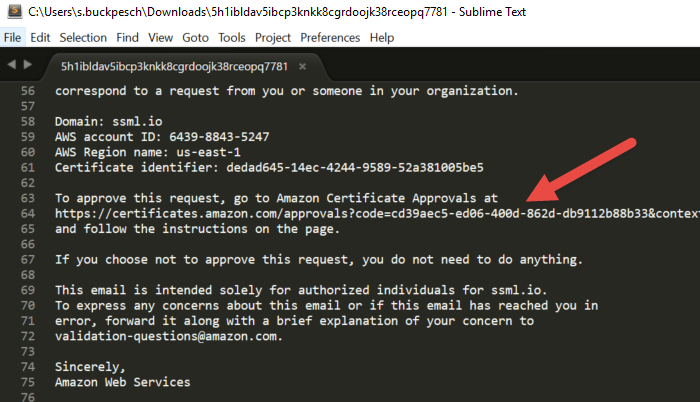
Now you should have a new email on your S3 bucket containing the verification link. Download the email file open it in your favorite text editor and copy the verification link to your browser.
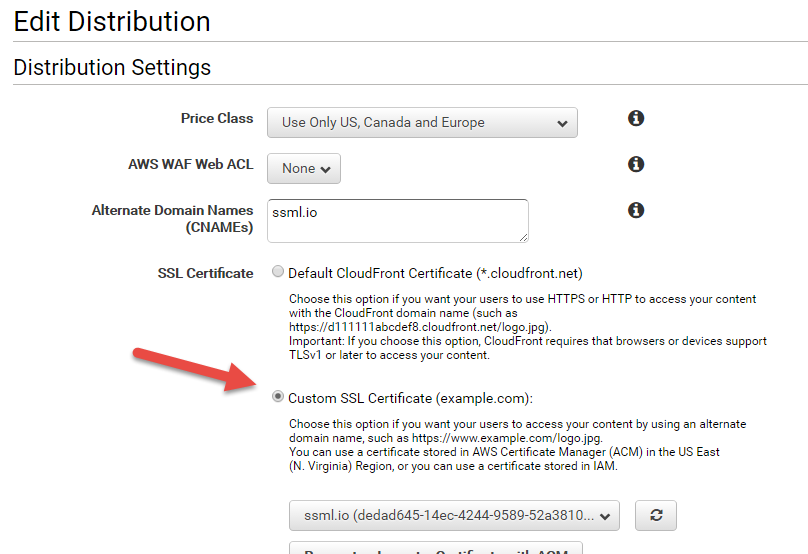
5) Assign the SSL certificate to your Cloudfront distribution You’re almost done. Go back to Cloudfront and edit your distribution. Now you should be able to select your brand new SSL certificate.
Congratulations. You’re done :-) Check it out
Origin https://medium.com/@sbuckpesch/setup-aws-s3-static-website-hosting-using-ssl-acm-35d41d32e394